


Can’t choose between a bob or a pixie for your next short-haired client? For the best of both worlds, try recommending the trendy “bixie!”
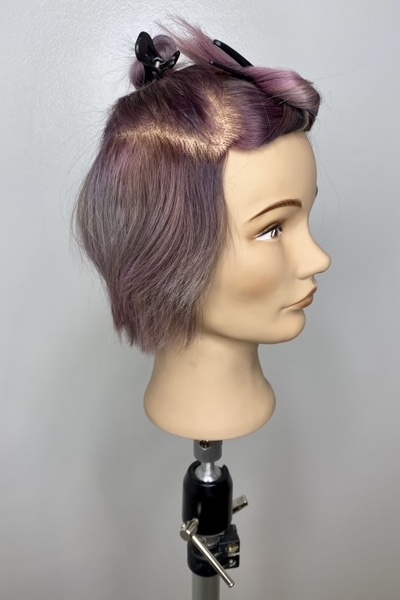
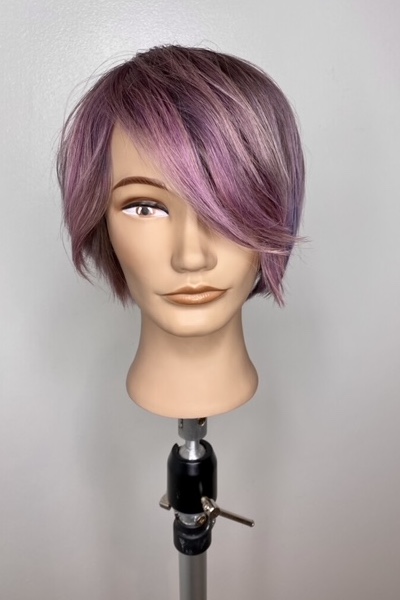
The bixie has become the go-to short hairstyle for 2022, and not only is it the perfect mix of both the classic bob cut and pixie, but it works great on all hair types.
Sam Villa ambassador Becka Bradshaw provides an in-depth step-by-step guide on how to achieve this popular, ’90s-inspired cut.
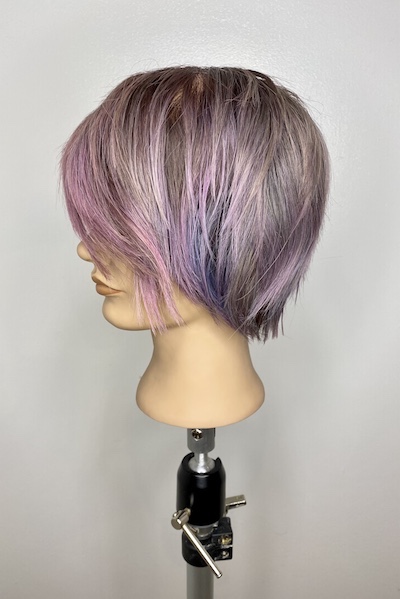
The Bixie Characteristics:
- Texture is used to give hair a shaggy effect
- Hair length is shorter than the chin
- The fringe area can be long or short
- Nape area can be clean or shaggy
How-To:
Step 1:
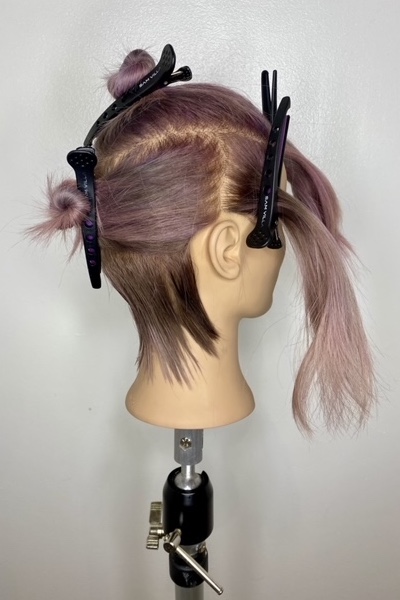
- Lightly mist the nape area with leave-in conditioner or cutting lotion (e.g. Redken One United).
- Divide the nape section into two sections down centre back.
- Elevate each section to a horizontal 90-degree angle using diagonal forward sections. Evenly finger angle remains with a diagonal finger placement to mirror the section.
- Use a razor to remove length and add texture by using a medium stroke. This section should hug the shape of the neck and be three to four inches long.
Step 2:
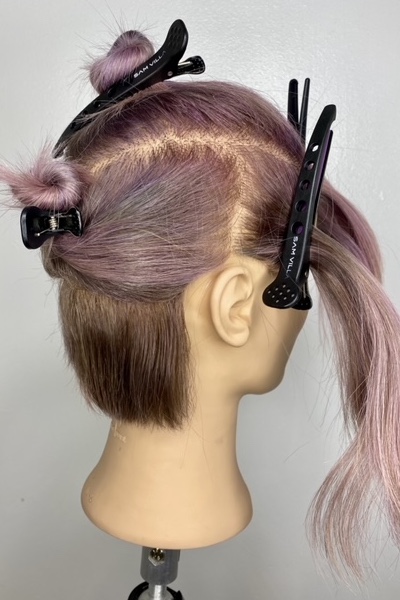
- Personalize the perimeter to either loose and wispy, or clean. Use a razor or a small shear to lightly surface cut in order to remove weight and length.
Step 3:
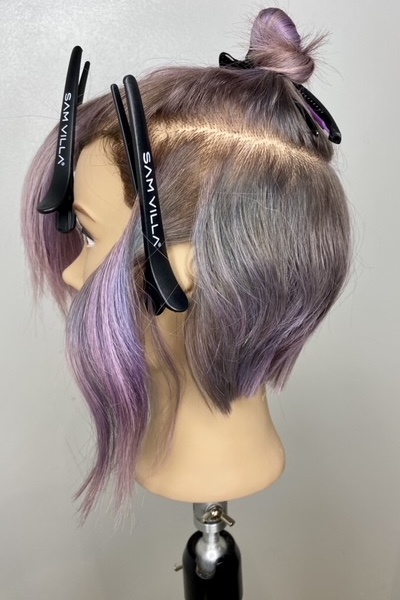
- To visibly blend and allow movement, create a detached area above the nape. Release the back section and cut the length with no elevation to match the perimeter outlined in step 2. Divide the back into four sections down the centre back and back corners. Each of these sections will be compressed using the perimeter, just cut as the guide.
- Elevate above the horizontal 90 degrees. Sections can be overdirected slightly back to push hair forward. A razor or shear can be used. Rounded softer layers that hug the shape of the head is the end result.
Pro Tip: If using a shear, deep point-cuts are recommended to promote movement.
Step 4:
- Stand in front of the client at their front corner (by the eye) and elevate to 90 degrees horizontally. The two sides will be cut using over direction.
- Compress this entire section vertically and cut from top to bottom using a piece from the top of the back section as a length reference point.
Pro-Tip: Using a razor with a longer stroke allows for removing length and weight in one step.
Step 5:
- Take pivotal partings starting at the centre back and rotate toward the front of the head for the crown. Elevate to 90 degrees vertically and cut with an even finger angle using the section below to find the guide for each section. This will create the shortest pixie pieces on top, which will be around three to four inches.
Step 6:
- Compress the section to centre front and elevate 45 degrees above the horizontal 90 degrees for the fringe. To allow for shortness at the top or to remain even, giving a heavier fringe area, finger angle should go in at the top of the head.
- Customize the fringe perimeter the same as the nape. The elevation will allow the fringe to be worn as a middle part or sideswept.


Comments are closed.