


Are you seeking additional Barbie-inspired hair to experiment with on your clients? Discover these two signature Barbie looks created by Sam Villa Ambassadors Karla Valenzuela and Ellen Devine, which any stylist can easily teach their clients for a stylish everyday appearance.
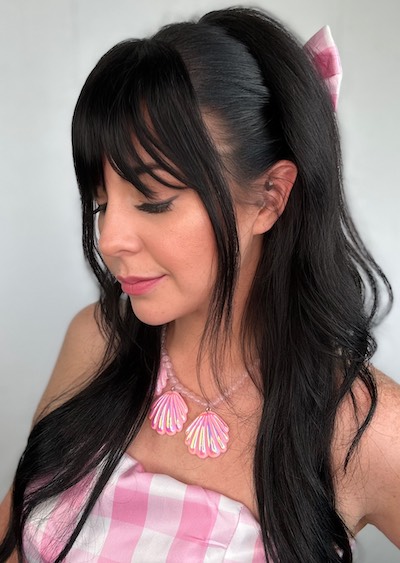
Half-Up Half-Down Barbie Updo:
Step 1: Take a small circle section at the back of the crown and secure into a low ponytail. Gather the rest of the hair in front from right behind the ear, drawing a diagonal line to the bottom of the previous ponytail. Use a finishing brush to smooth and secure the ponytail.
Step 2: Curl the hair left out, including the ponytails, using a Sam Villa Artist Series 2-in-1 Marcel Iron and Wand. If hair has trouble holding curl, wrap it around the iron to create a nice bounce to the hair. Once curls are fully cooled, brush to smooth using a paddle brush.
Step 3: For a little extra Barbie volume, use a Sam Villa Signature Series TexturÒ Professional Texturizing Iron on the first two inches of hair at the base. This makes the hair pump up bigger and also holds backcombing better.
Step 4: Starting with the bottom ponytail, place two fingers under the base, grab the tail and flip it up through the hair and pull to tighten. Use a tail comb to lightly backcomb the ponytail and smooth. Flip the ponytail up and secure the hair above the elastic with bobby pins to help avoid splitting. Repeat on top ponytail. Set with hairspray to control flyaways.
Step 5: In the movie Barbie has fringe, add clip-ons if needed. Then, smooth bangs with a Sam Villa Signature Series SleekrÒ Professional Straightening Iron in a “C” motion to get a little bounce and bevel. Add pink accessories, polish, dress…and voilà, Barbie!
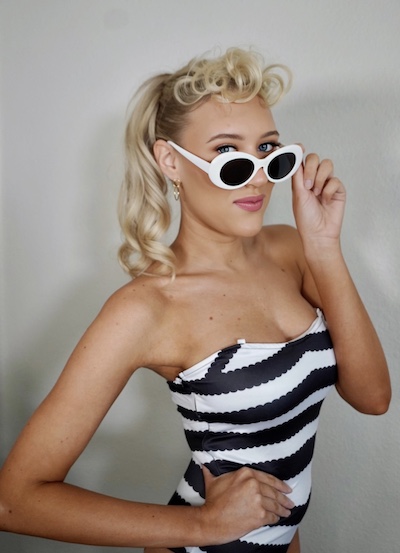
Vintage Barbie Ponytail
Step 1: Begin by sectioning out a horseshoe-shaped portion from the corners of the eyebrows to the crown.
Step 2: On dry hair, apply Redken Root Lifter Spray along the hairline. Using a Sam Villa Professional Light Ionic Blow Dryer, blow dry the hair in a directional manner towards the center back, establishing the foundation for a high ponytail.
Step 3: Gather the hair into a ponytail using a finishing brush. Secure the tail with a butcher’s knot using sewing elastic.
Step 4: Using the finishing brush and Redken Working Hairspray, bring back the horseshoe section. Combine it with the first ponytail and secure it again with a butcher’s knot.
Step 5: Create a small split between the ponytails. Take the smallest section (the horseshoe section) and bring the hair forward towards the forehead, forming a faux curly fringe.
Step 6: Apply Redken Thermal Spray 22 and use a Sam Villa Artist Series 2-in-1 Marcel Iron and Wand 1” to curl the hair in small sections, creating figure 6 curls.
Step 7: Spritz Redken Dry Texture Spray on the ends. Use your fingers to loosen and shape the curls, paying more attention to the ends.
Step 8: Smooth the section on top of the head forward with a finishing brush, ensuring not to brush all the way to the ends.
Step 9: Pin the curls in place to form the faux fringe. Bend the pins slightly to match the curve of the head, preventing them from sticking up. When inserting, weave the pins through the hair for a secure hold.
Step 10: Elevate the ponytail by using two bobby pins inserted through a hair elastic. Flip the ponytail upward and secure it with the bobby pins and elastic. Insert one pin on the right side and another on the left. The elastic will hold the ponytail in place.
Step 11: Curl the ponytail with the marcel iron at a vertical angle, creating figure 6 curls. Ensure all curls face the same direction. Style the curls with a finishing brush and complete the look with Redken Max Hold Hairspray.


Comments are closed.